I’m going to be honest here, I tried really hard to write a nice tutorial for this pillow but time just got away from me and I figured it would be past Easter by the time I would actually get this post up. So, maybe I will do this tutorial next year 🙂
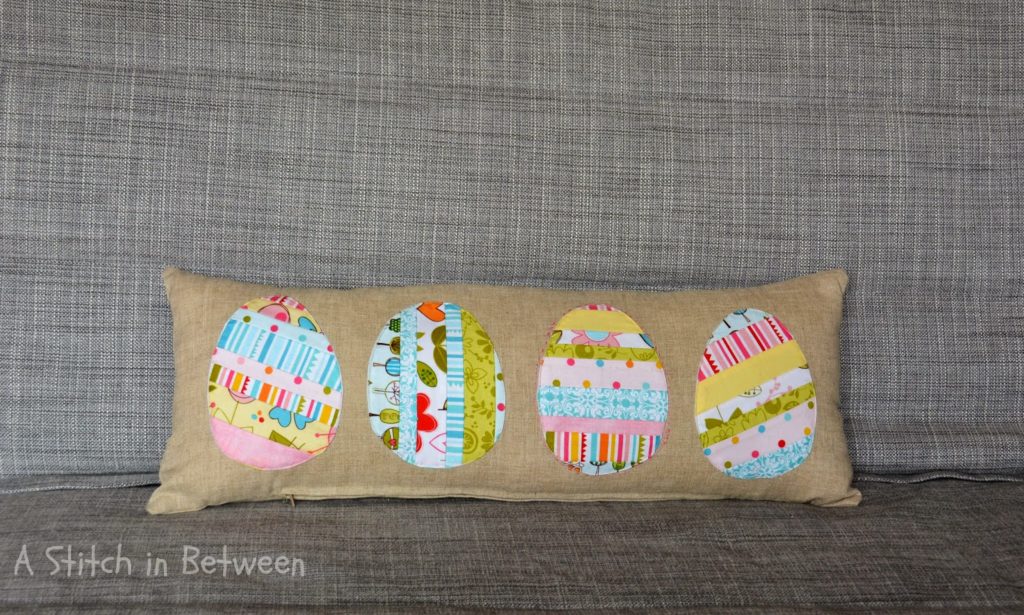
Awhile ago, I got a scrap bag from Alyce at Blossom Heart Quilts, and in the bag was part of the Riley Blake “Happy Skies” Jelly Roll. At first I thought maybe I would make a baby quilt, but the color scheme didn’t fit A’s room, however I think these are perfect Easter colors!!
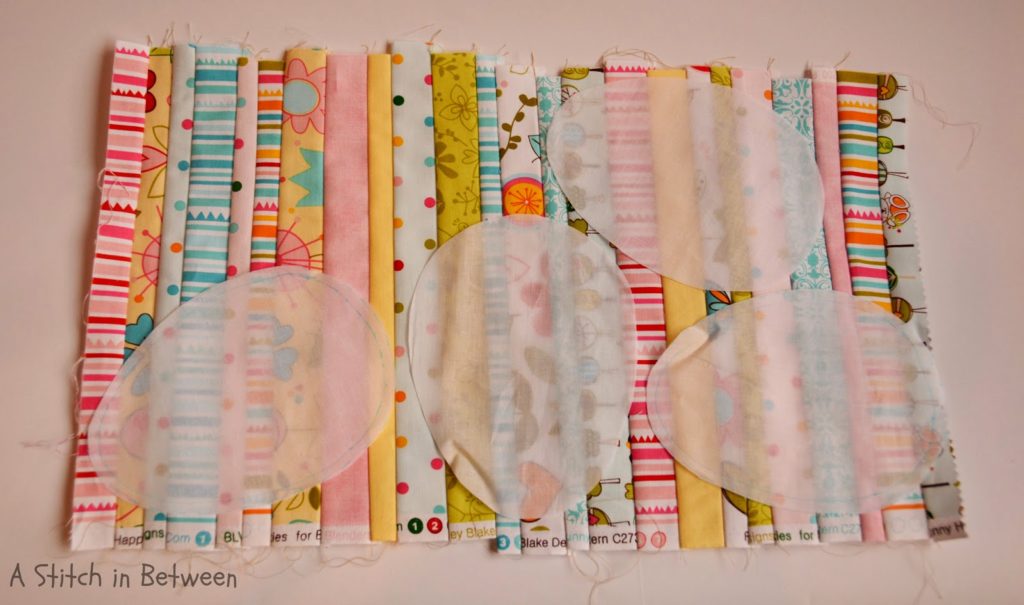
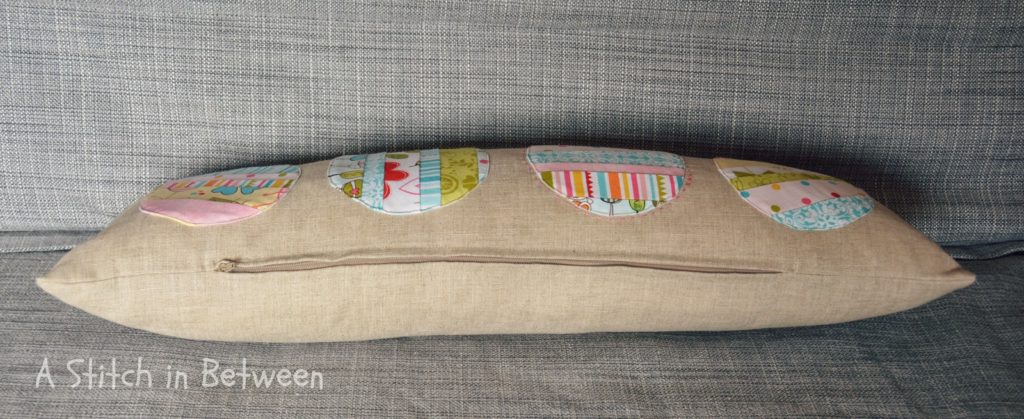
I cut up the strips into two different width (2.5 inches and 1.5 inches) and randomly sewn them together. I made the pieced rectangle long enough to fit 4 egg shapes (I just googled egg shape on the internet and printed off the size that I thought looked nicely on the pillow)
The egg shape is just thin white fabric I had laying around, it’s see through so perfect for placement and doesn’t add much bulk to the applique.
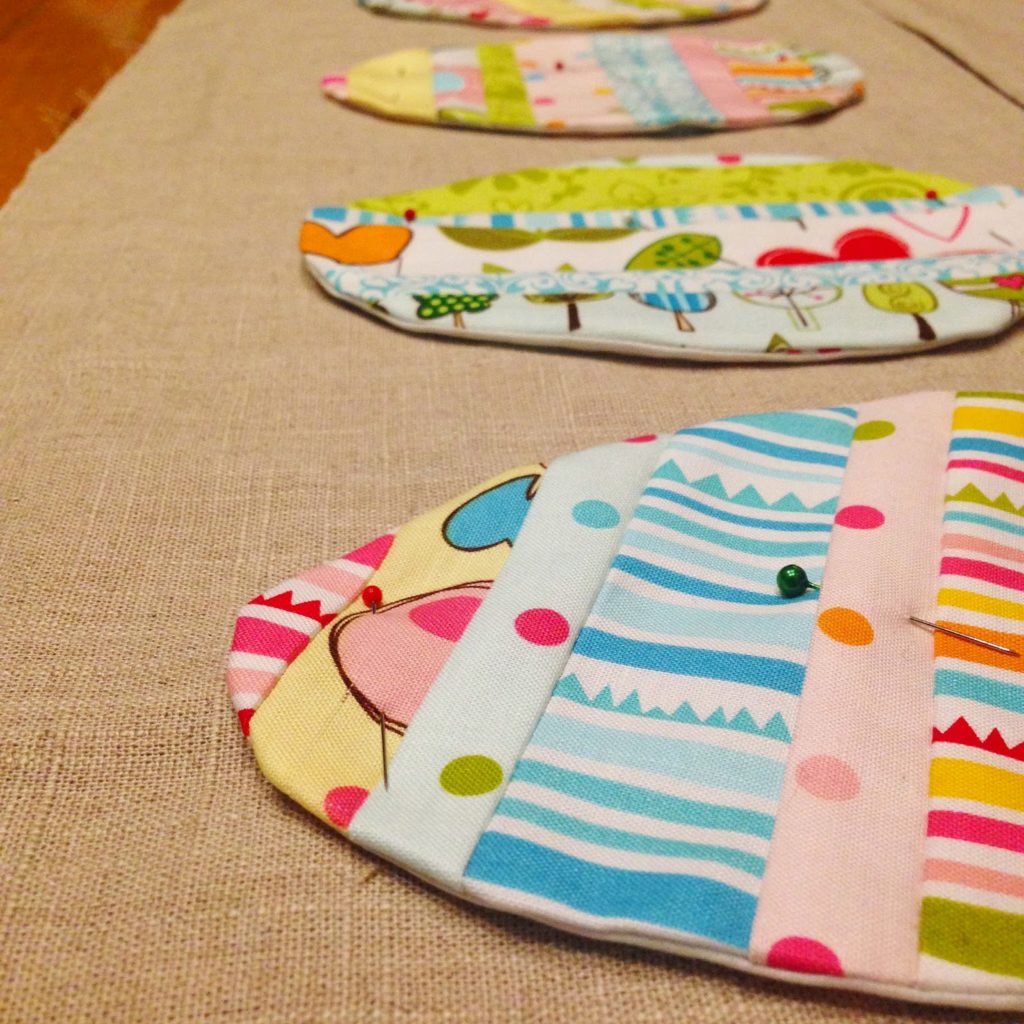
Sew your backing fabric and your patchwork shape right sides together. Cut through the middle of your backing fabric only (be careful not to cut through the patchwork). Turn inside out and press!
Usually, I’m a big fan of raw edge applique, but it just doesn’t work when you are making a patchwork applique because of all the random edges and threads, so there is how you make a nice edged shape.
This pillow form is from Ikea, so I used two 25.5 inches x 10.5 inches rectangles and a 19 inch zipper to make the pillow. Pin the egg shapes to the rectangle that will make the front of your pillow case, sew very close to the edge to secure them.
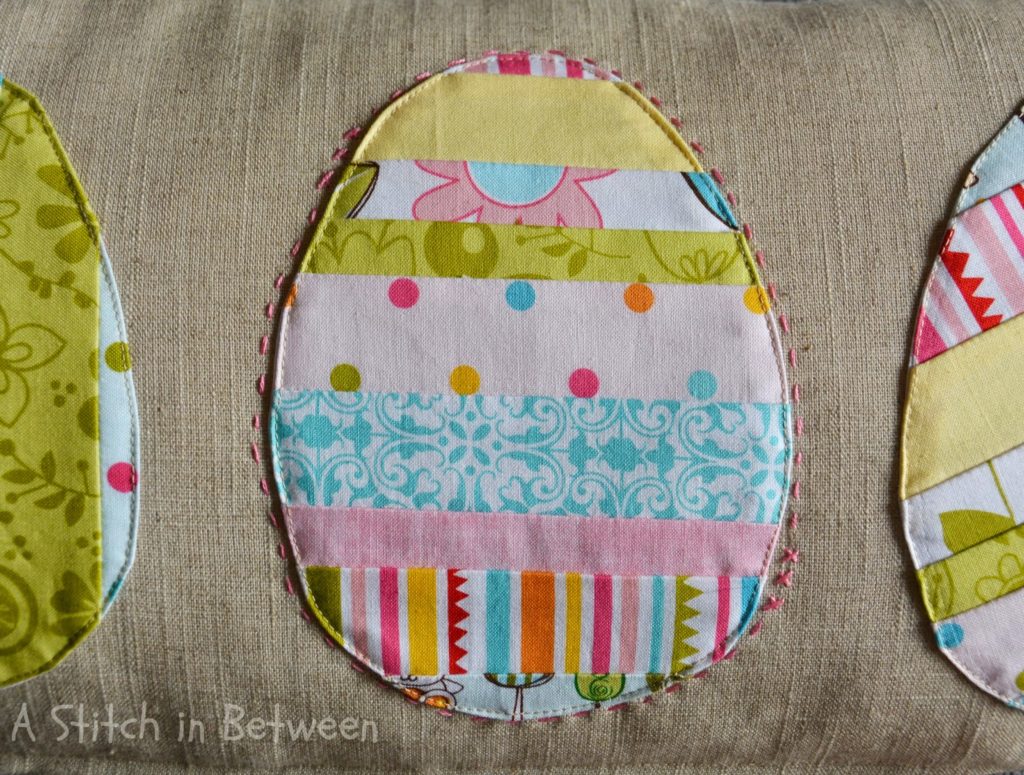
You can add decorative stitches using embroidery floss. I stitched around only one egg, because I thought it added a nice texture element without taking focus off the patchwork, but so far three people have asked me why only one egg has stitches? Oh well, maybe I will add some more stitching in the future.
I’m still working on the best way to install a zipper to the pillow, I kind of like to figure them out as I go. Not sure what this type is called, but there are a ton of tutorials on the internet on how to install a zipper.
Hope this was informative for you, as I said, it definitely is not much of a tutorial but more of a rough guide to easter egg applique. Let me know if you have any questions at all!

Very cute and very effective! Happy Easter! I may have to borrow this idea for another project!
I don't know how I've missed comments on this entry but thanks 🙂 🙂 I hope this technique will be useful to you, I'm not its inventor by any means but it worked well for me!
Thanks for sharing this. Your pillow is so cute. I have many scraps that would work great for this. I am visiting from the Sew Cute Tuesday link up.
Thanks for the visit Sherry, great to see you here! I do hope you will use it for your scraps, it seems like I will never find enough projects to use up all of mine. Of course I tend to use some none scraps in every project, which just leaves me with MORE scraps…
Seriously, such a brilliant way to applique this on!! Clever you!!
Alyce! Yey, thank you 🙂 I definitely did not invent this but could not for the life of me remember where I saw it done, so decided to just give it a whirl.. But Lord knows, I'm no tutorial writer
Hi from another expat living in Taiwan! You have some many cute craft projects on your blog. I especially love this one!!
Constance – http://foreignsanctuary.com/
I love these ones!! All of your projects are beautifully and carefully finished… thanks for sharing. I like the originality you give to each project. Will look forward to your next post!